Monday, January 30, 2012
Knooking!
Are you crap at knitting too? I know I am.
And now I don't have to miss out!!
I wonder if you can do this with just some scrap yarn and a regular crochet hook...
Saturday, January 28, 2012
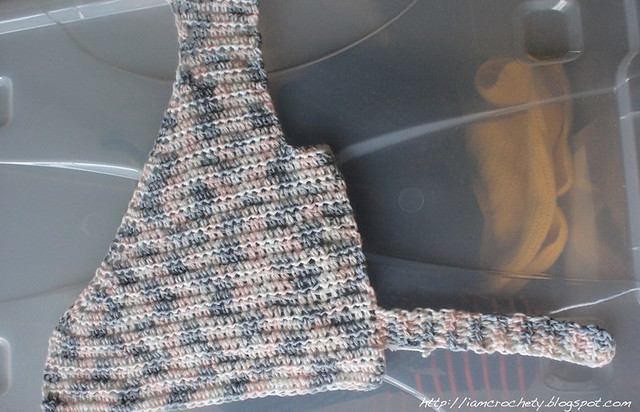
Kimono style baby top
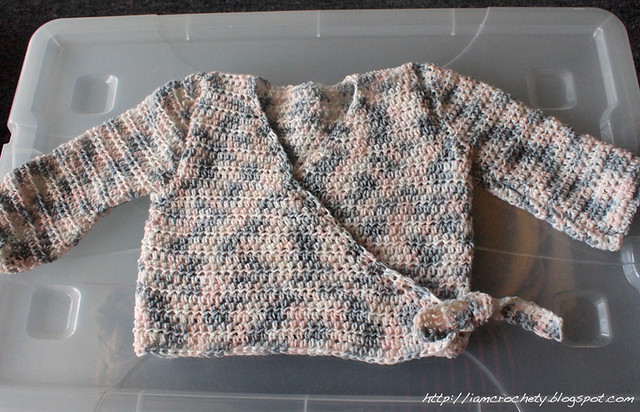
So many people around me have been having babies that I've been completely addicted to making baby clothes! These projects are small, easy, and quick to complete. And so much fun!
The following instructions are just what I've done - it's not perfect, but it makes a pretty cute top, if I do say so myself. Please feel free to adjust as you see fit.
Materials:
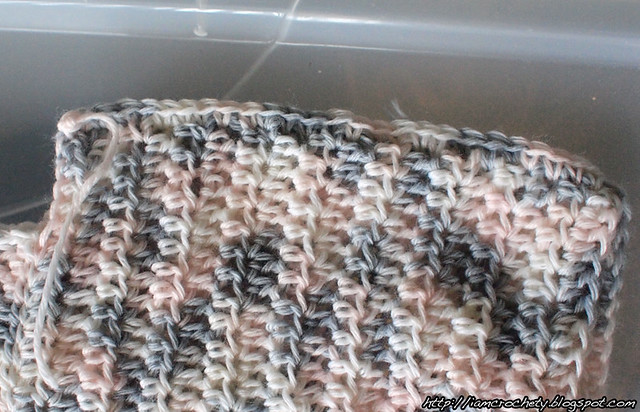
4ply yarn (2x 100g) I like the loose stitch look
5mm crochet hook
This pattern will make a 000 top.
Ch 40.
Row 1: In 2ch from hook, hdc in each . Ch 2 and turn
Row 2-17: hdc in each, ch 2 and turn.
Row 18: hdc in each. do not chain.
Row 19: sl stitch in first 3, hdc till the last 3 st. ch 2 and turn.
Row 20-27: hdc in each, ch 2 and turn.
Row 28: hdc in first 9 st. ch 2 and turn
Row 29: Dec over first 2 st, hdc in each till end.
Row 30: Hdc in each, ch 2 and turn
Row 31: 2 hdc in first st, hdc in each till end. ch 2 and turn
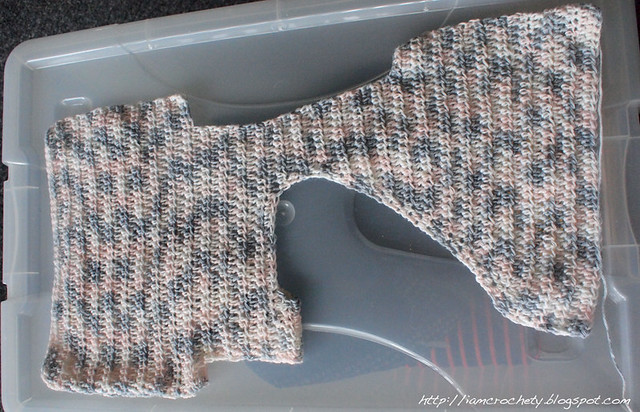
Row 32-40: keep 1 stitch at a time on the inside of the neckline. You'll end up with something like this:
Row 40: at the end, ch 5.
Row 41: hdc in second ch from hook, and hdc in each across.
Row 42-45: hdc in each st across, increasing by 1 hdc on the inside of the neckline.
Row 46-49: hdc in each st across, increasing by 2 hdc on the inside of the neckline.
Row 50: hdc in each st across, increasing by 3 hdc on the inside of the neckline.
Row 51-58: hdc in each st across.
Fasten off and weave in the ends.
Folded, the top will begin to look like this:
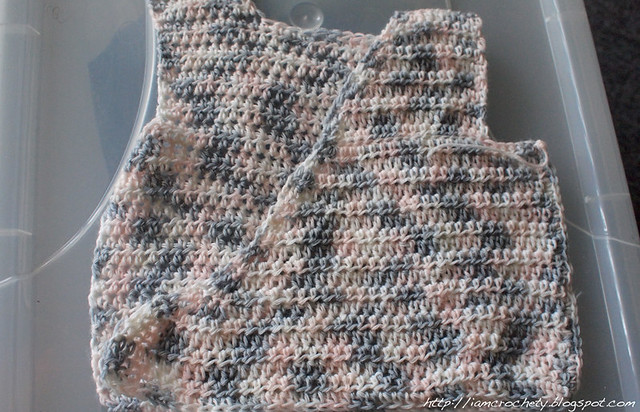
On the other side of the back piece, work 9 st into the shoulder, and repeat the same instructions for rows 29-58 of the other side, creating the two front halves that fold over each other.
In order to create the two pieces that will tie together, evenly stitch 5 sc into the corresponding sides of the font halves.
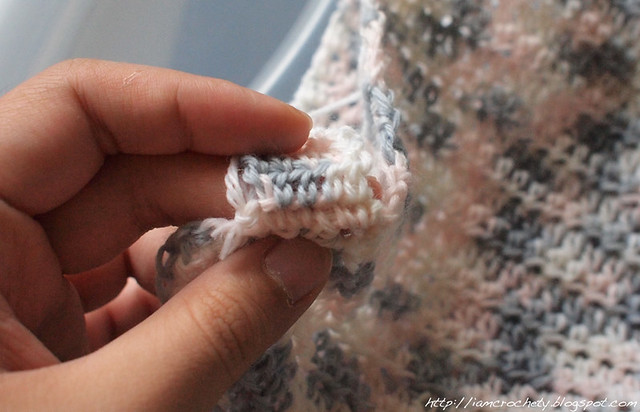
dc in each for 10 rows. Fasten off and weave in the ends.
Next, make the sleeves.
Ch 30.
Row 1-17: hdc in each st across, ch 2 and turn.
Row 18: hdc in each st across. do not ch.
Row 19: dec over first 2 st. hdc in each across till last 2 st and dec over last 2 st.
Keep decreasing until you have 10 st left.
Fasten off and weave in ends.
Make 2 sleeves.
Time to put all the pieces together!
Turn the sleeves inside out and, starting from the outer edge where the wrist is, sc evenly for 18 rows, joining the two ends together. Fasten off and weave in ends.
Do the same for the other sleeves, and under both arms.
With the sleeves the correct side out, and the 'vest' inside out, place the sleeve in the arm hole and sc evenly around the arm hole, joining the sleeves and vest piece of the jacket.
And tada!
A quick and easy kimono top for a little baby girl. Or boy, although it doesn't seem like a particularly masculine pattern.
Monday, January 16, 2012
Just Smile and Wave
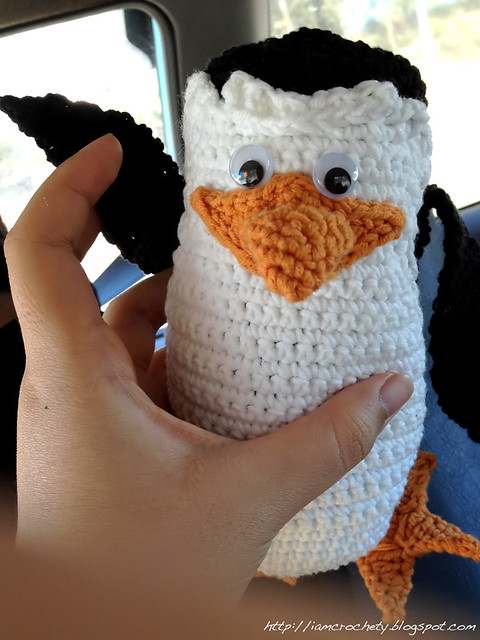
Wheee! To add to my crocheting streak, I present (a slightly wonky version of) Skipper! Skipper is one of the penguins of Madagascar, and is the leader of the rogue penguin pack. I got the pattern off Wolfdreamer, and I highly recommend her blog as she's got fantastic patterns for many different characters. I especially like her Mario and Luigi.
Friday, January 6, 2012
Shrek Ear Baby Beanie

Excuse the bad photo - it was a quick one taken on my iPhone.
I've been on a crocheting streak lately, and I thought I'd start a blog sharing pictures of what I made!
And so here we are.
I googled baby beanie ideas and saw that a number of people had attempted Shrek ears. It's a great idea, and is instantly recognizable by anyone who's seen (or not, people who don't know the reference must be living under a rock, surely) Dreamwork's Shrek. The four hit movies are full of puns and parodies, and it's a great laugh. For those who don't know the reference:

For the Beanie: Feel free to use your own beanie pattern - this is just the one that I've used.
I made first made a strip about an inch an a half wide. (9 dc stitches wide)
Make sure that this can go around the baby's head. (38 rows long)
Then join the two ends of the strip together, to get something like a headband.
I then did a single crochet perpendicular to the previous stitches (beginning the beanie portion), evenly spaced around the band.
Round 1: I ended up with 77 stitches in total. If you're making a larger beanie, just adjust the proportion. (77)
Round 2: *dc for first 9 stitches, then decrease over the next two*. Repeat ** till the end of the row, then join to the first dc using a slip stitch. (70)
Round 3: *dc for the first 8 stitches, then decrease over the next two*. Repeat ** till the end of the row, then join to the first dc using a slip stitch (63)
Round 4: *dc for the first 7 stitches, then decrease over the next two*. Repeat ** till the end of the row, then join to the first dc using a slip stitch (56)
Round 5: *dc for the first 6 stitches, then decrease over the next two*. Repeat ** till the end of the row, then join to the first dc using a slip stitch (49)
Round 6: *dc for the first 5 stitches, then decrease over the next two*. Repeat ** till the end of the row, then join to the first dc using a slip stitch (42)
Round 7: *dc for the first 4 stitches, then decrease over the next two*. Repeat ** till the end of the row, then join to the first dc using a slip stitch (35)
Round 8: *dc for the first 6 stitches, then decrease over the next two*. Repeat ** till the end of the row, then join to the first dc using a slip stitch (28)
Round 9: *hdc for the first 6 stitches, then decrease over the next two*. Repeat ** till the end of the row, then join to the first hdc using a slip stitch (21)
Round 10: *sc for the first 6 stitches, then decrease over the next two*. Repeat ** till the end of the row, then join to the first sc using a slip stitch (14)
Round 11-: Keep decreasing over every two stitches using sc till the top of the beanie is completely closed.
For the ears:
Row 1: ch 8 and turn
Row 2: sc second ch from hook and continue till end of row
Row 3: touch both ends together and sc onto the first stitch of the row, creating a spiral. sc in each till the end of the row.
Row 4 - Row 9: sc in each stitch
Row 10: sc in first stitch, hdc in next, three dc in next, hdc in next, slip stitch in rest.
Row 11: 2 sc in first stitch, 2 hdc in next, 2 dc in next, 2 dc in next, 2 dc in next, 2 hdc in next, 2 sc in next, slip stitch till the end of the row and finish off.
Make two ears. then position on beanie and sew on!
-----------------
It's really quite simple, although I do apologise for the vague-at-times instructions. Since I did it by 'feel', it's a little difficult to pin down exact counts.
It's also my first time writing instructions, so fingers crossed!
Please feel free to leave a comment should you have any questions, and I'll try to answer them.
Subscribe to:
Comments (Atom)